Looking for a specific recipe? Search here:

Friday, July 26, 2013

French Baguettes


I took advantage of an unusually cool summer day this week.  Bread is not something I usually bake during hot weather and chicken soup is something else that is rarely on the menu during the summer months.  It just seemed the right combination with the fall like weather for a day in the month of July.
It’s amazing how such simple and few ingredients produce something that’s enjoyed in various shapes, sizes and textures globally.
We basically grew up on Italian style bread.  As a child I remember the bread truck stopping by the house and delivering large loaves of crusty Italian bread.  I also remember the bread man that would show up daily at our non-Italian neighbour's house. 
It’s an image I am not likely to forget.  Dressed in a light brown uniform with matching cap I still remember the size and weave of his basket and the neat display of the various baked goods.  Often wondering why our bread man carried such minimal variety I secretly hoped that our neighbor’s bread man would visit our house one day…he never did.
This recipe for French Baguette has been a favourite for many years.  The crisp yet chewy crust and soft interior makes a perfect accompaniment to any meal.  We love our Italian style bread but the French Baguette is a pleasant change from the usual.
Gone are the bread delivery men of yesteryear with their charming wicker baskets and tidy uniforms although the variety of breads available today are boundless and could never be contained in a bread basket.

French Baguettes
1 tablespoon sugar
2 cups warm water
1 tablespoon active dry yeast
about 5 cups all-purpose flour
1 tablespoon salt
2 tablespoons soft butter
1 teaspoon corn starch
2/3 cup water
  1.  Dissolve sugar in warm water and let stand about 10 minutes or until yeast foams.
  2. Place 2 cups of the flour into a large bowl, make a well in the flour and add the yeast mixture, butter and salt.
  3. Beat with a wooden spoon or electric mixer at low speed until smooth and elastic.
  4. Stir in about 3 cups of remaining flour gradually adding enough flour to make a stiff dough.
  5. Turn dough out onto a floured surface and knead 5 to 10 minutes using as much of the remaining ½ cup of flour until dough is no longer sticky.
  6. Place dough into a greased bowl turning dough over to grease top and cover with a clean tea towel.
  7. Let rise in a warm place until nearly doubled, about 1 to 1 ½ hours.
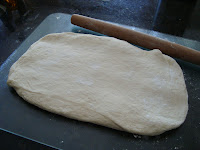
  8. Punch dough down and turn out onto a lightly floured surface and roll dough out into a 9X12 rectangle.
  9. Cut dough into 4 equal strips.
  10. Fold each strip in half and seal edges together.
  11. With palms of hands roll the strip of dough until approximately 18 inches in length. Repeat with remaining strips of dough.
  12. Place baguettes on a greased baking sheet and allow to rise until puffy but not doubled, about 15 to 20 minutes.
  13. Heat cornstarch and water together until boiling, allow to cool slightly, brush loaves with cornstarch mixture.
  14. Using a very sharp knife make slanting slashes across loaves about ½ inch deep at 2 inch intervals down entire length.
  15. Bake in a preheated 375 degree F. oven for 15 minutes then brush again with cornstarch mixture.
  16. Bake an additional 15 minutes and brush again then bake 10 minutes until golden brown.
  17. Place on rack to cool.


 Notes, Tips and Suggestions
  • I find that the 18 inch loaves are a bit too long for my oven unless baking them one at a time placed diagonally on a baking sheet.  Instead, four 15 inch loaves can be more easily accommodated.
  • The recipe has been posted in its original form however I reduced the salt to 2 teaspoons instead of 1 tablespoon which in my opinion gave a better balance.
  • This bread is best eaten the day it's made, freeze the rest for another day.
  • Panzerotti anyone?  This dough works very well.


French Bread Pan
This bread pan turns out authentic looking French bread with rounded bottoms and dotted pattern made from the tiny perforations on the pan.  It's not a must but the loaf is an absolute joy to admire when it comes out of the oven!


Friday, July 19, 2013

Raspberry Ricotta Buckle


Berry season is upon us once again.  Strawberries ripening in the nearby fields allow that once a year experience of enjoying fully ripened berries at their peak.

Raspberries aren’t quite ready yet but the non-local ones in the supermarket have been very tasty lately suggesting that raspberry season comes sooner and is being enjoyed elsewhere already.
 
Left over ricotta from last week's Ricotta Pancakes and a fantastic buy on raspberries this week inspired me to try out a recipe that was sitting at the top of my recipes to try out file.
 
Unlike the 30 year wait for the French Gourgere the recipe for Raspberry Buckle hardly waited a couple of weeks before moving to a more permanent recipe collection.
 
A buckle captures delicious fruit between the cake and streusel layers adding moisture and a fresh fruit texture and taste.  The tartness of raspberries along with the sweet layers of cake and streusel provide a balance that is truly enjoyable.
 
At the very least, the aroma filling the kitchen while this coffeecake is baking is something you really shouldn't miss!


Raspberry Ricotta Buckle
Cake
1 cup ricotta
¾ cup sugar
2 large eggs
¼ cup unsalted butter, melted
1 tablespoon vanilla
2 tablespoons lemon juice
2 cups all-purpose flour
1 ½ teaspoons baking powder
¼ teaspoon baking soda
¼ teaspoon salt

Streusel and Fruit
1 cup all-purpose flour
¾ cup sugar
½ teaspoon baking powder
Pinch ground cinnamon
6 tablespoons unsalted butter, melted
3 cups fresh or thawed, frozen raspberries

Cake
  1. Preheat oven to 350 degrees F. and grease a 9x13 pan.
  2. Wisk the ricotta, sugar, eggs, melted butter, vanilla, lemon zest and juice together.
  3. In a separate bowl sift together flour, baking powder, baking soda and salt.
  4. Add to ricotta mixture and stir just until blended and spread into prepared pan.
Streusel and Fruit
  1. For the streusel, stir together the flour, sugar baking powder and cinnamon then stir in the melted butter until the mixture is evenly combined.
  2. Layer the raspberries evenly over the batter. (If using thawed, frozen berries, drain excess juice and toss with 2 tablespoons flour.
  3. Top the fruit with the streusel.
  4. Bake for 45 to 55 minutes or until a tester inserted in the center of the cake comes out clean
  5. Cool cake in the pan before serving.
  6. The cake will keep wrapped and unrefrigerated for 3 days.


Notes, Tips and Suggestions
  • Blueberries, blackberries or strawberries might be  berry good alternatives to raspberries.
  • Cut and serve directly from pan.
  • This recipe doesn't recommend refrigerating the coffee cake as refrigeration renders it stale much faster.  This is true for bread as well and I recently read it becomes stale six times faster if stored in the refrigerator. Too long on the counter however and you may end up with a great specimen for an interesting science experiment. To be safe, if you can't use it within a couple of days it's better off in the freezer.  

Friday, July 12, 2013

Ricotta Pancakes with Blueberry Sauce


The art of making pancakes must be one of the more simpler things to master but I must confess that until coming across this recipe I did not enjoy much success in making a good pancake.
 
I must have missed the class for pancakes 101 and we certainly didn’t grow up eating pancakes therefore had no good recipe to fall back on.
 
Things got worse before they got better since I couldn’t even make a good pancake from a packaged mix.  After trying several from scratch recipes it became clear that pancakes were not going to be the best things I ever made.
 
Each time the thought of making pancakes came to mind it was readily dismissed fearing the outcome. My family basically survived on homemade waffles instead and no one asked any questions.  Perhaps they dared not bring up the subject because of past pancake experiences and the fear of enduring one more bad pancake.
 
A couple of years ago I came by this recipe for Ricotta Pancakes quite unexpectedly.  I'm particularly fond of cooking with ricotta and happened to have some on hand at the time.  Fearing the worst but hoping for the best I took courage and made a batch.
 
What can I say... finally, a really good pancake!

Ricotta Pancakes
2 eggs (separated)
2/3 cup ricotta
¼ cup milk
2/3 cup plus 2 tablespoons flour
½ teaspoon baking powder
  1. Beat egg whites until stiff.
  2. Beat together ricotta, egg yolks and milk until smooth.
  3. Mix together flour and baking powder and add to ricotta mixture beating until mixed.
  4. Fold egg whites into ricotta mixture until no white remains.
  5. Cook on a hot buttered griddle until bubbles appear on the surface of the pancake, turn over and cook other side.
  6. Makes about 10 to 12 five inch pancakes.
Blueberry Sauce
2 cups fresh or frozen blueberries
Juice of 1 lemon
2 tablespoons granulated sugar.
  1. Place all ingredients into a medium size pot.
  2. Heat until sugar dissolves.
  3. Place half of the mixture into a blender and puree.
  4. Return puree to the remaining blueberries in the pot and simmer until mixture reduces to desired consistency. 


Notes, Tips and Suggestions
  • The blueberry sauce is a little on the tart side, next time I will add a little more sugar and reduce the lemon juice to half the amount called for. 
  • Serve pancakes with butter and maple syrup or fresh fruit instead. 
  • The recipe for Blueberry Sauce can be easily cut in half if full amount is not needed.

Friday, July 5, 2013

Banana Chocolate Chip Cookies


It's been a while since I've had some very ripe bananas to contend with.  After considering a few recipes I remembered one particular cookie recipe that I would often make for my kids while they were still quite young.

This recipe comes from a little booklet I received in Home Economics class so many years ago.  It’s been some time since I’ve made them therefore had to reach into my recipe archives to locate the booklet.

You might think you're eating banana cake when you try these for the first time as they are soft and moist and have a very rich banana flavour.

Although the booklet is a little tattered from all the wear and tear... literally, I was so happy to see it again as it brought back many memories of my school years as well as my children’s. There it was, printed on the last page, the recipe for Banana Chocolate Chip Cookies.

Whenever I baked these cookies they never made it into a cookie jar or container but remained on the cooling rack until every last one of them was gone. The batch made more than enough for the day's after school snacks and before bedtime treats with a few disappearing from the rack in between.

I never bothered to ask who the culprit might be and imagine they think they got away with it.

Although these are classified as drop cookies and easily formed by dropping spoonfuls of dough onto a cookie sheet I've always used a pastry bag and large plain tip to make them more uniform in size and shape.  A pastry bag is definitely not a must since they will taste just as delicious no matter what size or shape they are made in.

After removing them from the oven and placing on the cooling rack today, I realized that they were not to be after school snacks nor before bed time treats and not one would go suspiciously missing so I went looking for a container to place them in.

Think I'll take some to the grand kids!

Banana Chocolate Chip Cookies


2 ¼ cups all-purpose flour
2 teaspoons baking powder
½ teaspoon salt
¼ teaspoon baking soda
1 cup sugar
2/3 cup shortening
2 eggs
1 teaspoon vanilla
1 cup mashed, ripe banana
1 cup chocolate chips
  1. Preheat oven to 400 degrees F.
  2. Sift together flour, salt, baking powder and baking soda.
  3. In a medium size bowl beat together sugar, shortening, eggs and vanilla.
  4. Add dry ingredients to wet ingredients and mix well.
  5. Stir in banana and chocolate chips.
  6. Drop dough with tablespoon onto greased or parchment lined cookie sheets.
  7. Bake 12 to 15 minutes until they are set and lightly golden.  Do not over bake.
  8. Cool cookies on rack.
  9. Makes about 5 dozen 2 inch cookies.


Notes, Tips and Suggestions
  • If you decide to use pastry bag and large plain tip to form cookies use mini chocolate chips as the large ones tend to get stuck in the pastry bag tip.
  • Make sure bananas are very ripe.
  • Freeze any extra as they are at their best on the day they are made.