Looking for a specific recipe? Search here:

Friday, June 28, 2013

Spicy Chick Pea Salad


A healthy dish of legumes makes a dinner appearance at least once a week and since Lentil and Bean soup have already been on the menu in the past couple of weeks, it’s time to give chick peas a turn. 

The fact that they are a great source of protein, quite versatile and tasty, makes me seriously consider becoming vegetarian.

At my mother’s table chick peas were always served as a main course mixed with rice or some form of short pasta then drizzled with a good quality, extra virgin, olive oil.  One thing was sure however, they were always cooked from scratch and never came from a can.

After such a hearty dish and the fact that the protein intake for the day had been accounted for, a fresh, crisp salad was all that was needed to complete the meal.  Even without all the “healthy food” information available today we instinctively ate very well!

I am somewhat still following in her footsteps, no canned chick peas in my house.  A large pot of dry chickpeas soaking in water can be found on my kitchen counter the night before cooking them. This is a good time to have a pressure cooker on hand as the cooking time reduces considerably and a tender, uniform texture is most often the result.

This week I prepared chick peas and pasta for dinner just as my mother taught me.  However, feeling  a little adventurous I used some leftover chick peas to make a  salad for lunch the following day, something my mother had never made for us.

Among the recipe choices I came across, this one added the least ingredients leaving the chick peas as the main attraction.  Good simple choice to start, perhaps I will add a few more ingredients suggested in other recipes to my next salad.

I’m going to run this recipe by my mother sometime soon…her reaction will, to say the least, be unpredictable!

Spicy Chick Pea Salad


I’m posting the recipe in its original form using canned chick peas which work very well if you don’t have any prepared from scratch.

one 19 ounce can chick peas, rinsed and drained well
2 tablespoons olive oil
1 clove garlic finely minced or pressed through garlic press
fresh lemon juice to taste
crushed dried hot red pepper flakes, to taste
2 tablespoons chopped fresh Italian parsley
  1. In a bowl stir together chick peas, oil, garlic, lemon juice, red pepper flakes and parsley.
  2. Add salt, to taste.
  3. Chill salad, covered for about 30 minutes.
Cooking Your Own Chick Peas
  1. Soak chick peas overnight in a large pot filled with cold water.
  2. Drain water and refill with cold, fresh water covering chick peas by 3 to 4 inches.
  3. Add 2 to 3 bay leaves, 2 stalks of celery, 2 to 3 cloves of garlic and salt to taste.
  4. If using pressure cooker, bring to a boil, lower heat and cook for about 45 minutes.
  5. If cooking in a regular pot, bring up to a boil then reduce heat to a simmer and cook until tender. (this method may take double the time that it takes to cook them in the pressure cooker.)
  6. To use as a main, cook some rice or short pasta like tiny shells or snap linguini into 1 inch pieces and mix in, drizzle with good quality olive oil. 


Notes, Tips and Suggestions
  • If you are preparing the chick peas from scratch the longer soaked in water the shorter the cooking time will be.  Overnight is best.
  • Cook the entire bag of chick peas and eat for many times.  Place the extra amount in serving size portions and freeze.  They will certainly come in handy on those days when deciding what to make for dinner eludes you!

Friday, June 21, 2013

Lemon Poppy Seed Biscotti


For the past several weeks I’ve been craving something lemony with a sprinkle of poppy seeds.

An absolutely light and flavourful recipe for Lemon, Poppy Seed Chiffon Cake was the first that came to mind.  This cake serves at least fifteen people, definitely a little too much to consume with no party plans in sight.    

A promising recipe for Lemon, Poppy Seed Muffins pending in my “to try out file” was a close contender until my mind turned to a more crunchy side of something sweet.

It seems the best of flavour combinations always end up in a good biscotti and I wondered if there were any existing Lemon, Poppy Seed Biscotti recipes worth a try.  Well it seems that a good number of people have been enjoying them for a long time and are willing to share their recipes. How nice!

After a quick glance at several different recipes, the ingredients and method of preparation for one in particular seemed to rise above the rest.

This recipe totally missed the “waiting to be tried out file” and has already gained a permanent place in my repertoire of absolutely amazing biscotti.

Wonderfully delicious!!

Lemon Poppy Seed Biscotti

½ cup butter (softened)
2/3 cup sugar
1 tablespoon finely grated lemon zest
1 ½ tablespoons poppy seeds
1 teaspoon baking powder
½ teaspoon baking soda
1 teaspoon lemon extract
2 eggs
2 ½ cups all-purpose flour
  1. Sift together flour, baking powder and baking soda, set aside.
  2. In a large mixing bowl beat butter and sugar until light and fluffy
  3. Add eggs one at a time until well mixed.
  4. Blend in lemon zest, lemon extract and poppy seeds.
  5. Add flour in 2 to 3 additions until well blended.
  6. Divide dough in half and shape them into  3 inch diameter rolls.
  7. Place rolls onto ungreased or parchment lined sheets and flatten slightly.
  8. Bake in a 375 degree F. oven for 20 minutes or until a toothpick inserted in the center comes out clean.
  9. Cool on sheet for about 5 minutes or until cool enough to handle.
  10. Cut logs diagonally into ½ inch slices using a serrated knife.
  11. Reduce temperature to 325 degrees F.
  12. Arrange slices flat on the cookie sheet and bake an additional 8 minutes, turn over and bake 5 minutes more until surfaces are crisp and light brown. Cool on wire rack.
  13. Makes approximately 24 biscotti.


Notes, Tips and Suggestions
  • Instead of lemon extract, a few drops of natural lemon oil gives great flavor. (Can be purchased at a bulk food store.)
  • Original recipe calls for 1/3 cup butter, I find that 1/2 cup works better for the amount of  flour called for in the recipe.  I found this to be the case in another biscotti recipe as well.
  • These biscotti are not too sweet and make great "dunkers".
  • They also freeze very well.

Friday, June 7, 2013

Coffee Ice Cream


It's hard to believe that the recipe for this Coffee Ice Cream came together with some left over cream and no ice cream maker available at the time.

The choice of making it without a machine seemed worthwhile and if things hadn’t worked out favourably, a cold, decadent coffee shake wouldn’t have been the hardest thing to swallow.

The Simply Vanilla Ice Cream recipe previously posted requires an ice cream machine and is absolutely creamy and delicious.  I’ve used the same recipe to make a very good coffee ice cream by omitting the vanilla and adding a few tablespoons of instant espresso coffee powder instead.

On the other hand the Lemon Ice Cream recipe I make does not require an ice cream machine and in my opinion makes a most delicious, tangy, creamy, ice cream that’s hard to beat.

Having no access to the ice cream machine on that particular day the choice of a good recipe was limited so a little experimentation was in order.  Not being absolutely sure of the result in replacing the lemon juice with coffee powder I chose to take a calculated risk.  After all, what could possibly go wrong in combining cream, sugar and coffee?

A last minute choice of replacing the milk in the original recipe with ten percent cream, along with the thirty five percent whipping cream already on the ingredient list produced a texture and taste that was well beyond creamy and delicious.

I don’t recommend this ice cream become a staple in your freezer due to its highly decadent nature.  However, keeping some in the deep freeze for any length of time will be your greatest challenge!

Coffee Ice Cream
1 ¼ cups 35% cream (unwhipped)
1 cup 10% cream (half and half)
1 cup granulated sugar
Additional ¼ cup half and half
3 tablespoons instant espresso coffee powder
  1. In a medium plastic container stir together both creams and sugar until well blended.
  2. Cover and freeze 5 hours or overnight.
  3. Stir the 3 tablespoons instant coffee powder into the ¼ cup half and half, cover and refrigerate.
  4. Remove from freezer and break up the frozen mixture then place into a bowl.
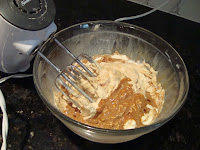
  5. Beat with electric mixer until light and fluffy scraping bowl often.
  6. Working quickly to prevent melting, gradually add coffee mixture until well mixed, light and fluffy.
  7. Spoon mixture into a chilled container, cover and return to freezer.
  8. Freeze at least 5 hours but preferably overnight before serving.
  9. Makes one liter of ice cream.


Notes Tips and Suggestions
  • This ice cream does not freeze hard but very easy to scoop out and enjoy right away.
  • Place the empty ice cream storage container in the freezer ahead of time which will keep the mixture from melting once it's placed inside. 
  • A little portion of this ice cream goes a long way.  Serving it in espresso cups makes a great presentation.