Looking for a specific recipe? Search here:

Saturday, October 27, 2012

Harvest Apple Cake


Apple season is almost over and I'm finally posting an apple recipe.

It hasn’t been the best of seasons for apples this year but I did manage to buy a half bushel of the Spy variety from a farmer’s market a few weeks ago.  Unfortunately I really wasn't impressed by the quality or taste.  After baking a few apple pies and several batches of apple muffins I was ready to try a new apple recipe.

I’ve already posted a good recipe for Apple Cake which layers sliced apples in the center of the cake and is baked in a square baking pan.
A few different recipes that I have saved over time differ by finely chopping or grating the apples and incorporating them right into the cake batter. A Bundt or Angel Food Cake pan is a good choice for this size cake as the tube in the center of these pans ensures even baking.

Even though the recipes are similar in ingredients and method of preparation, the one I finally chose to make called for a mix of brown and white sugar and used a little less sugar than the other recipes. This apple cake is moist, flavourful and light taking into consideration the two cups of apples that are added to the batter.  I will definitely make it again and though very impressive baked in a specialty pan I might try using two loaf pans next time.

There was a time when an entire Bundt cake would have barely been enough to go around but is now definitely too much for a significantly smaller family.  Some time ago I purchased a set of two small size Bundt pans which allow me to divide the batter and make two smaller cakes.

The cinnamon sticks placed in the center are entirely optional and used for presentation purposes although I once made a spice cake for a friend to be served at a special gathering and also used cinnamon sticks as a garnish. They disappeared along with the cake!

One smaller cake is easier to finish and the second one will be wrapped and placed in the freezer to be enjoyed at a later date.

Better still I could think of someone who would appreciate it and give it away instead!

Apple Harvest Cake

2 ¼ cups flour
1 tablespoon cinnamon
2 teaspoons baking powder
½ teaspoon baking soda
1 teaspoon salt
1 cup granulated sugar
¾ cups packed brown sugar
3 eggs
¾ cups corn or vegetable oil
1 teaspoon vanilla
2 cups (3 medium) apples, peeled and finely chopped
  1. Peel, core and finely chop apples.
  2. Sift together flour, cinnamon, baking powder, baking soda and salt.
  3. In a medium bowl beat until light and fluffy eggs, granulated and brown sugar vanilla and oil.
  4. Stir dry ingredients into wet then beat with mixer just until well mixed (about 1 minute.)
  5. Stir in apples.
  6. Place batter into well greased Bundt pan or divide into 2 smaller pans.
  7. Bake in a preheated 325 degree F. oven for 50 to 60 minutes until tooth pick inserted into center of cake comes out clean.   Baking time will be shorter if baked in smaller pans, check if done at 40 minutes.
  8. Cool in pan for 15 minutes then invert onto cooling rack to cool completely.


Notes, Tips and Suggestions
  • Make sure pan is well greased using shortening or cooking spray.
  • Add ½ to ¾ cups chopped walnuts or pecans for a change.
  • Top with a thin maple glaze by mixing together 1 cup confectioner’s sugar, ¼ cup maple syrup and 1 teaspoon of vanilla until smooth.  Pour over cooled cake and allow to set.

Friday, October 19, 2012

Streusel Layer Coffee Cake


I love the extra richness of baked goods with a sweet streusel topping.

The crumbly topping on muffins, quick breads, pies and coffee cakes adds a layer of flavour and texture that is very satisfying to the palate.

On occasion I replace the top crust on apple pie with a delicious streusel layer giving it a different twist along with a welcome change from the usual.

The recipe for Streusel Coffee Cake has been in my recipe collection for many years, however I can’t remember the last time I actually made it. It's been so long  that I found it hard to remember exactly where the recipe was hiding. It was a happy reunion once I located it as it brought back to memory the different occasions on which it was served.

One thing I haven’t forgotten is how delicious and easy it is to make and how enjoyable it is with a cup of coffee or tea.

A light dusting of confectioners’ sugar dresses it up to serve on the more special occasion of sharing it with someone else.


Streusel Layered Coffee Cake
1½ cups flour
2 ½ teaspoons baking powder
½ teaspoon salt
1 egg
¾ cups sugar
1/3 cup butter (melted)
½ cup milk

Streusel Topping
½ cup packed brown sugar
2 tablespoons soft butter
2 tablespoons flour
1 teaspoon cinnamon
½ cup finely chopped walnuts

  1. Mix streusel ingredients in a small bowl until crumbly. 
    Set aside.
  2. Sift together flour, salt and baking powder.
  3. In a separate bowl beat together butter, sugar and egg and gradually add milk.
  4. Stir flour mixture into wet ingredients until well mixed.
  5. Place half of the batter into greased pan and sprinkle with half of the streusel mixture.
  6. Top with remaining batter and sprinkle with remaining topping.
  7. Bake in a preheated 375 degree F. oven for 25 to 30 minutes.
  8. Remove from oven and cool completely before cutting.
  9. Dust with a fine layer of confectioners’ sugar before cutting, (optional).


Notes, Tips and Suggestions
  • This coffee cake freezes very well.
  • Also delicious with a thin drizzle of melted chocolate over the top after it has cooled.
  • After greasing pan, line with parchment paper for easier removal of coffee cake.

Friday, October 12, 2012

Peanut Butter Cookies

I don’t  bake many cookies throughout the summer months since there's such a variety of things to bake using seasonal fruit and vegetables.

I woke up one morning last week with Peanut Butter Cookies on my mind.

I think it had something to do with the cooler weather and the warm feeling that comes with removing a sheet of freshly baked fragrant cookies from the oven. It could also be that this was the time of year I baked cookies that made their way into school lunches.

It also brings memories of a very special time when the kids were quite young. At the end of the day  I would set out four differently coloured plastic glasses brimming with cold milk on four paper napkins and a home made cookie or two on the side for their pre-bedtime snack. Each had their favourite coloured glass and woe to the one who would “accidentally” take the glass that belonged to someone else.

As enjoyable as milk and cookies was for the kids I enjoyed the feeling that they would all soon be tucked into bed for the night.

This recipe for Peanut Butter Cookies has been the winner for more years than I can remember. I don’t recall where the recipe came from but these cookies taste exceptionally good and are really easy to make. Whenever someone tastes them for the first time I find myself sharing the recipe once again.

I am now taking the opportunity to go public with this recipe for those who have not come across it in their cookie recipe adventures.  It’s definitely too good to keep to myself!

Peanut Butter Cookies
1/2 cup butter or shortening
1/2 cup brown sugar
1/2 cup granulated sugar
1 1/2 cups flour
1/2 teaspoon baking soda
1/2 teaspoon salt
1 large egg
1 cup peanut butter
1 teaspoon vanilla
  1. Sift flour, baking soda and salt into a bowl, set aside.
  2. In another bowl beat shortening or butter until fluffy then add sugars, vanilla and peanut butter until well blended.
  3. With a wooden spoon mix dry ingredients into wet ingredients until completely blended.
  4. Roll dough into small balls , place on ungreased or parchment lined cookie sheets and with a fork flatten the dough.
  5. Bake in preheated 375 degree F. oven for 12 to 15 minutes.
  6. Cool cookies on rack.
  7. Makes 20 to 24 cookies depending on size. 


Notes, Tips and Suggestions
  • Either butter or shortening can be used in these cookies but shortening will give a crisper texture.
  • Chunky peanut butter can be substituted for smooth.
  • A handful of chocolate chips make a great addition.
  • Cookies can be made in various sizes just keep an eye on smaller ones as baking time will be less. 
  • Eating a few of these cookies accompanied by a cold glass of milk just might bring back some sweet childhood memories.

 Need a bigger cookie jar...


Friday, October 5, 2012

Sweet Onion and Herb Focaccia


Fall is my favourite time of year. Crisp sunny days, cool nights and back to the days where a hot bowl of soup is a welcoming sight.

This past summer was enjoyable and the first gardening experience at our new home has been fulfilling.  We are still enjoying a few tomatoes from our plants that don’t seem to want to give up and the cucumbers gave their best allowing us to share and share again.

There’s nothing that bonds neighbours together like a gift of home grown tomatoes and cucumbers passed over the fence.  I think we have actually inspired a few more neighbourhood gardens for next summer.

The aubergine plants have surprised us with a second crop and this week I will be harvesting two more gorgeous eggplants, totally unexpected but again graciously accepted.

My little crop of herbs has amazed me.  They have given all summer long and will keep on giving throughout the winter months after being dried and stored. 

I have never been a fan of store bought dried herbs since they rarely give the flavour they promise.  Oregano and the small leaf Globe Basil were the only herbs that I ventured to dry out from the garden each year since they gave very good results. This year I have managed to successfully add lemon thyme, rosemary and a small amount of cinnamon basil to my collection.

A sprinkle of freshly dried herbs on a Sweet Onion Focaccia I baked this week gave me the first taste of a most delicious winter ahead!

 Sweet Onion and Herb Focaccia


Topping
2 large or 3 medium Vidalia or Sweet Texas Onions
2 to 3 tablespoons vegetable or corn oil
salt to taste
1 teaspoon sugar
1 to 2 tablespoons mixed dried herbs (rosemary, thyme, oregano, basil etc.)
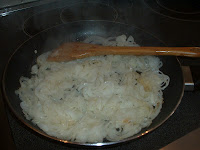
  1. Peel and slice onions very thinly.
  2. Heat oil in a skillet on medium heat then add onions.
  3. Gently saute onions then add salt and sugar and continue to cook until soft and golden.
  4. Remove from heat and set aside.
Focaccia Dough
4 ½ cups flour
1 tablespoon salt
1 tablespoon dry yeast
2 cups warm water
1 teaspoon sugar
¼ cup olive oil
  1. Dissolve yeast and sugar in 2 cups warm water.
  2. In a bowl mix together 2 ½ cups flour, olive oil and salt then add dissolved yeast mixture.
  3. Beat with a wooden spoon until soft elastic dough is formed.
  4. Add remaining 2 cups of flour gradually until dough begins to come together.
  5. Place dough on a floured surface and knead for a few minutes until soft, elastic and smooth.
  6. Cover and let rest for at least 20 minutes.

Sweet Onion and Herb Focaccia
  1. Place dough in the center of an oiled pan.( approximate measurement 10X15 inches.)
  2. With fingers poke and stretch dough until it fills the pan.
  3. Top with sautéed onions and sprinkle generously with dried herbs.
  4. Let rest uncovered for 15 minutes.
  5. Bake in a preheated 400 degree F. oven for 25 to 30 minutes or until golden.
  6. To retain a crisp crust, remove from pan and cool on rack.


Notes, Tips and Suggestions
  • Make a simple herb focaccia by omitting onion and brushing top of unbaked focaccia with olive oil then sprinkle with herbs and course salt.
  • Focaccia may be shaped into a round pan if desired.
  • A smaller pan makes a thicker foccacia.
  • Delicious used as sandwich bread (testimonials available upon request:)


Drying Fresh Herbs

When living in our former home I would harvest the oregano and globe basil at the end of the season, tie them into bundles and dry them in the basement.

Quite unintentionally, after cutting the fresh herbs this year I decided to bundle and leave them hanging in our backyard tool shed for a while then later complete the drying process indoors.

Wise choice as the heat in the wooden tool shed dehydrated the herbs very quickly and with great success.

I encourage everyone to plant an herb garden in the summer, enjoy using them while fresh then dry and store them for the coming winter months. A few plants will yield enough dried herbs to last the winter until it’s time to plant again in the Spring.

Once you’ve enjoyed freshly dried herbs in your winter dishes you will never again reach for store bought which will unfortunately continue to age on the shelf.

The Dehydrator


Drying Herbs Hanging from the Rafters

CINNAMON BASIL


LEMON THYME


GLOBE BASIL


OREGANO


ROSEMARY


Summer In A Jar