Looking for a specific recipe? Search here:

Friday, May 25, 2012

Tomato Bruschetta


Although Bruschetta can be topped with one of many possibilities there’s nothing more classic to include in a delicious Antipasto spread than Tomato Bruschetta.

I've always been interested in the origin of food and my curiosity confirmed what I had already suspected about the origin of this truly delicious combination of flavours and textures.

History reveals that people have been eating Bruschetta since the 15th century but perhaps in a different way that it is served today. We seem to be enjoying a more refined version of this dish whereas in times past “rustic” might be the key word.

This was originally  poor man’s food, a snack or meal taken to the fields by those who spent the day working there.  At best, it consisted of stale bread with a drizzle of olive oil and salt only improved by the addition of a few ripe tomatoes on top.

The word Bruschetta correctly pronounced [bru'sket:ta] originates from the Roman dialect and  literally translates “ to roast over coals”. (If pronounced correctly your taste experience will reach new heights.)
Here we thought it was about the topping  but it's really all about the bread!

I suppose toasting the bread on the barbeque would be as close as we may ever get to the authentic preparation of "roasting over coals"  but a panini grill or broil function on the oven have served me very well over the years.

While growing up I don’t recall my mother ever making Bruschetta as part of an Antipasto.  Perhaps this was because we enjoyed it as a totally different experience and definitely didn’t call it Bruschetta.

I remember how she would transform what were basically pieces of  stale, hard, leftover bread into lunch fit for a queen.  A generous drizzle of olive oil and a few ripe tomatoes would be squeezed onto the bread until the juices permeated and made it slightly softer.  It was then finished off with sprinkling of salt, oregano and thin slices of sweet onion.

It was never called Bruschetta but known to us as “pane, olio e sale” translated “bread, oil and salt.”  Of course these words were spoken in her Italian dialect which are next to impossible to write down but simply music to our ears.

It seems that nothing can stop a good recipe, this one has traveled through the centuries and has only gotten better with time although my mother's version has remained somewhat unchanged.

On occasion, when the craving strikes and nothing else in the fridge will do, I visit the container where I store the hardened bread reserved for making breadcrumbs and retrieve a few pieces.

I'll leave the rest to your imagination.

Tomato Bruschetta


french stick, baguette or any other variety of crusty bread 
olive oil
salt
pepper (optional)
oregano
ripe tomatoes
scallions or any variety of sweet onion
basil
  1. Prepare bread (see preparation of bread in recipe for Roasted Pepper and Olive Crostini)
  2. Remove as much of the seeds in ripe tomatoes as possible and chop into small pieces and place in a bowl.
  3. Finely chop onion and basil and add to tomatoes along with oil, salt, pepper and oregano.
  4. Mix well.
  5. This can be made a few hours ahead and left for the flavours to marry or can be used right away.
  6. Spoon the mixture onto prepared bread.


Notes, Tips and Suggestions
  • Even though most varieties of tomato can be used, the Roma variety holds its shape best without becoming mushy.
  • Ripe tomatoes work best for flavour and texture.
  • If you don’t prefer adding onions, finely chopped chives add a more subtle onion flavour.
  • Use a good virgin olive oil for the best taste experience.
  • For something different add a few small pieces of soft bocconcini cheese on top of the tomato mixture.
  • For a party idea leave the tomato mixture in the bowl place in the center of a large platter and place toasted bread all around. Guests can assemble their own.
  • Don’t prepare too far in advance of eating to prevent soggy bread.
  • When toasting the bread the outside should be crisp but inside should still be soft and chewy.
  • I find better results in using bread that is a few days old instead of a fresh loaf.

Friday, May 18, 2012

Antipasto Salad


At last... no cooking required, assembly only.
A good Antipasto spread is not complete without an assortment of marinated vegetables and olives.

This may include at least two to three varieties of olives, marinated artichokes, mushrooms and eggplant, hot and sweet pickled peppers and a medley of tangy pickled vegetables commonly known as giardiniera.

Sectioned platters are a good way to display these delicious morsels but on one occasion I was inspired combine some of these together and create a delicious antipasto salad.

A few varieties of pitted olives, marinated mushrooms and artichokes and the addition of a few sun dried tomatoes should there be any on hand make a great combination.
The different tastes and textures included in this mix compliment each other well and make an interesting and attractive presentation.

It couldn’t be easier, deli bars in some grocery stores give the option of purchasing various ingredients in the exact amount required, otherwise most items are available in jars found on the store shelves.

If you're disappointed that there's not enough work involved in preparing this dish you may want to prepare and marinate your own mushrooms and artichokes to make up for it.

Perhaps I will leave that for another post.

Antipasto Salad

A selection of favourite ingredients including:

pitted Calamata olives
pimento stuffed green olives
marinated artichokes
marinated mushrooms
sun dried tomatoes in oil (optional)
  1. Drain oil from marinated mushrooms and artichokes
  2. Mix together all ingredients.
  3. Place into a serving dish or bowl.


Notes, Tips and Suggestions
  • Feel free to add different ingredients of your choice to this salad.
  • No dressing required as the mushrooms and artichokes have been marinating in oil, garlic, red pepper flakes and fresh parsley.
  • This salad can be assembled a few days prior to serving.
  • Refrigerate, remove from fridge about an hour before serving.
  • Any leftovers make a delightful snack the next time hunger strikes.

Friday, May 11, 2012

Roasted Pepper and Black Olive Crostini


According to the Food Dictionary, Antipasto is defined as "a course of appetizers in an Italian meal which may include cured meats, cheese, fish and raw or marinated vegetables."

This description is the least that can be said, a full description would take up too much space and most likely fill the pages of a book.  Literally the word translates as “before the meal” or as another source puts it "food before food."  No surprise that Italians can actually have a course of food before the meal!

Antipasto choices can be endless and range from something decadent and elaborate leaving no room for the next three courses to something truly simple and delicious that whets the appetite for better things to come.

Sometimes we get carried away in the preparation of a good antipasto and it can become a meal in itself.  On the other hand, just this past weekend I enjoyed an antipasto dish at my sister’s house that was too simple to be that good and I vowed to make it for my next special dinner event.

I will share a few selections from a vast repertoire of favourites though by no means giving this “food before food” course total justice or even beginning to address the possibilities.

Previous posts on Zucchini Crostini and Seafood Salad are some choices that make excellent additions to a good antipasto spread.

Since just about anything tastes good on a piece of toasted bread and still having peppers on the mind,  Roasted Pepper and Black Olive Crostini seemed to be a good place to begin.

Don’t let the steps involved in  preparing the roasted peppers overwhelm you and keep you from enjoying this recipe.  The steps to roasting the peppers can be skipped altogether with a quick trip to the grocery store and  purchase of a jar of fire roasted red peppers. I haven’t tried them myself (yet) but they look good enough to use in a pinch if the need arises.

Roasting the Peppers

Red, or a mix of red, yellow and orange Bell Peppers
  1. Wash and dry peppers well.
  2. Heat barbeque to high setting (may also be roasted in the oven on broil)
  3. Grill, turning peppers as they become charred. (black is okay as you will be peeling the skin away)
  4. Once all sides have been charred, remove and place in a glass bowl.
  5. Cover tightly with plastic wrap (this allows the peppers to sweat making removal of skin very easy.)
  6. When cool, remove and discard skin and seeds.

Roasted Pepper and Black Olive Crostini
baguette
roasted peppers
olive oil salt and pepper to taste.
oregano
black dry cured olives (pitted if possible or you will have to pit them)
peeled garlic clove cut in half to expose juices.
  1. Slice bread diagonally into one inch slices (diagonal cut gives more surface area for topping.)
  2. Brush each slice with olive oil and a little oregano.
  3. Rub garlic clove over bread.
  4. Grill bread in panini press or broil in oven until toasted.
  5. Slice cleaned peppers lengthwise into thin strips then chop crosswise making small pieces.
  6. Place in a bowl and add salt, pepper and just enough olive oil to coat peppers.
  7. Coarsely chop black olives and mix into pepper mixture.
  8. Place spoonfuls of peppers onto prepared bread slices and serve.


Notes, Tips and Suggestions
  • If you absolutely love garlic and don’t mind eating pieces of it, finely chop and add to peppers instead of rubbing clove on bread.
  • Roasted peppers can be served as a side dish, prepare as above but do not chop, omit the olives and add a few capers.
  • After roasting and cleaning, peppers they may be frozen successfully. 
  • Keep in mind that if cured, salted olives are used you may need to adjust the amount of salt used to season.
  • Place topping on bread close to serving time to prevent bread from getting soggy.

Friday, May 4, 2012

Peppers Pizzaiola


As much as we enjoy Stuffed Cubanelle Peppers my mother’s recipe for Peppers Pizzaiola is one that we probably enjoy even more.

While growing up and even to the day I married and moved into my own home I was never responsible for preparing a meal for our family. Though not being hands on in the daily preparation of meals, unknowingly I was attending a very good culinary school located in my mother's kitchen. The lessons learned there taught many skills that would serve me well in the future.

My mother was a full time mom and never worked outside of the home so we were spoiled by her always ready and delicious meals, clean laundry and a general sense of security and well being, knowing that she was always there. Since the art of dessert was not one of her stronger attributes my sister and I were assigned to that responsibility.  Later on my sister became the sole pastry chef while I was banished to the sewing machine to keep us all fashionably dressed. (This sounds like a good plot for a modern day fairy tale.)

After marrying and moving out, a quick phone call to my mother would give me a basic idea of how to prepare some of the dishes that I enjoyed while living at home.
By now you are probably aware of the fact that her recipes never included exact amounts of ingredients, cooking times or oven temperatures so over the years I’ve had to figure a few things out on my own and take ownership of her recipes.
I believe that this is the first time they have been written down and feel good about doing so as it would be a shame to think they might not otherwise be passed along.

After watching the many television commercials it’s truly sad to see the food memories now being made consisting of how fast and how little effort we can get away with when putting together a meal. Top marks always go to products of convenience which make it easy for eating on the run but not so easy on our health or wallet.

Home made nutritious food, a warm inviting kitchen, family all around the table and a good recipe…now here's some food for thought!

Peppers Pizzaiola


These are the measurements of ingredients used for 8
smaller size red, orange and yellow peppers
¾ cups plain tomato sauce (puree peeled plum tomatoes, strain out seeds)
½ cup grated cheese (Parmigiano, Crotonese)
1 tablespoons dried oregano
Fresh basil leaves (as much as you want)
¼ cup olive oil
2 to 3 cloves garlic (peeled and finely chopped)
Salt and pepper to taste
¾ cups water
  1. Wash peppers, cut in half, remove stem and seeds then cut into chunks or strips.
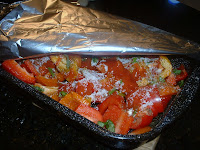
  2. Place cut peppers in a baking pan add the rest of the ingredients on top of the peppers.
  3. With hands or spoon thoroughly mix all of the ingredients together until peppers are well coated.
  4. Add water to the pan then cover with foil wrap.
  5. Bake in a 375F degree oven for about 45 minutes
  6. Uncover and bake an additional 20 minutes.


 Notes, Tips and Suggestions
  • I’ve done my best to put together a basic recipe and method of preparation for these peppers. You may want to alter amounts of ingredients to suit your taste and needs.
  • When in season, fresh oregano works well.
  • For a variation, add some favourite mushrooms along with peppers before baking. Oyster mushrooms pair with the peppers very well.
  • Clean and cut peppers then freeze in zip lock bags, use in this recipe at a later date.  When using, add frozen peppers to baking pan then add the rest of the ingredients, proceed as in the above method. Omit the water since the frozen peppers will have enough water in them to create a juice, bake. 
  • This is another dish to practice your "bread dipping" skills.