Saturday, September 29, 2012

Carrot Cheesecake Muffins


I’ve had this recipe in my to try out file for a very long time and  am now finally getting around to putting it to the test with hopes of  passing it over to my tried and true file.

These Carrot Cheesecake muffins are actually the coming together of two separate recipes that I suspected had a good chance of becoming a delicious combination.

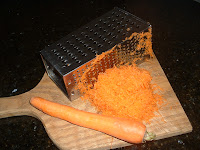
I recently purchased a ten pound bag of freshly harvested carrots, definitely a few too many to use up before loosing their freshness.  I shared them with my daughter and daughter-in-law who quickly put them to good use though taking two different routes. One batch found its way into a steaming carrot soup and the other batch into fragrant carrot bread.

I’ve been a little slower using up my portion of carrots but hope to find a few good ways of enjoying them soon.  Baking these Carrot Cheesecake Muffins was definitely a good start and this recipe has now passed into a more permanent file.

If you enjoy carrot cake with cream cheese frosting you will find these muffins absolutely delicious and definitely not as sweet as the cake and icing, which can be a good thing. The addition of finely grated orange zest to the cream cheese filling should not be omitted as it adds a level of flavour that I would not have imagined.

Since I had never tasted these muffins before and no other taste testers were in sight I volunteered to taste and make that all important executive decision to post the recipe.

After eating the first muffin I found it necessary to indulge in another to make absolutely sure that this was a recipe worth passing along. Risking the possibility of enjoying a third  I just knew that the right decision had been made and decided to go ahead and post the recipe leaving some muffins for the others to enjoy.

Carrot Cheesecake Muffins

Cheesecake Filling
125 gr. cream cheese (1/2 of a 250 package)
3 tablespoons granulated sugar
1 1/2 teaspoons finely grated orange zest

Muffin Batter
2 eggs
2/3 cup brown sugar (packed)
1/2 cup vegetable or corn oil
1/4 cup milk
1 1/2 cups grated carrots
1 1/2 cups all purpose flour
1 1/2 teaspoons baking powder
1/2 teaspoon baking soda 1/2 teaspoon salt
1 teaspoon cinnamon
  1. Line muffin tins with paper liners or grease tins.
  2. Bring cream cheese to room temperature.
  3. Add the sugar to cream cheese and beat until well combined.
  4. Stir in orange zest and set aside.
  5. Into a bowl sift together flour, baking powder, baking soda, salt and cinnamon.
  6. Place eggs,oil, milk and brown sugar into a blender and blend until light.
  7. Add the grated carrots and pulse blender 2 to 3 times to incorporate carrots (do not blend carrots in.)
  8. Make a well in the dry ingredients and add wet ingredients.
  9. Stir just until mixed (do not over mix.)
  10. Spoon half of the batter into each muffin well , distribute filling evenly in the middle of each batter filled well then cover evenly with remaining batter.
  11. Bake in a preheated 400 degree F oven for 20 to 25 minutes or until golden.
  12. Remove muffins from pan and place on cooling rack to cool. 


Notes, Tips and Suggestions
  • These muffins are also delicious without cheesecake filling. 
  • Chopped walnuts make a good addition if omitting filling.
  • As always it's very important not to over mix the batter.
  • Muffins freeze very well.


Saturday, September 22, 2012

Pear Crisp


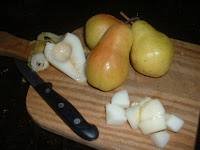
I've been missing my little Bartlett pear tree at the old house this past week.  At this time of year it’s usually heavy with fruit just waiting to be picked.

I regret not trying new pear recipes when I had so much fruit at my disposal.  Much of the fruit went to family, friends and neighbours and the rest were either preserved in jars or made into jam.  We are now enjoying the last few jars of pear jam from the last fruit we harvested from that tree.

A small pear tree was planted in the backyard of our new home early last Spring and we are anticipating a modest harvest next summer. 

When shopping for our new tree it was interesting to find out that in order for a pear tree to bear fruit there must be a specific other variety of pear tree in the vicinity for cross pollination to occur. Our old tree did so well thanks to our neighbour’s pear tree.  There are no visible pear trees in our new neighbourhood so on advice from the nursery staff we purchased a tree that produces four different varieties of pears to ensure successful cross pollination.

Who could have possibly known such details. We are now a little better informed and it will actually be interesting to see four different pear varieties grafted onto one tree.
If all goes well along with my favourite Bartlett variety we may also enjoy Anjou, Flemish Beauty and Comice pears. I can't wait!

While looking for new pear recipes I came across several that looked delicious and promising. Since Bartlett pears are my favourite I selected some recipes that called for this variety. These pears ripen beautifully even when stored in the refrigerator.

Their sweet taste and wonderful texture can be enjoyed in so many different ways. This simple recipe for Pear Crisp is delicious although it initially left me with a few puzzling questions.  No problem, nothing that a few alterations, additions and omissions didn’t fix.

In the end we enjoyed a rather tasty dessert. 

Pear Crisp

Filling
6 ripe pears
2 tablespoons freshly squeezed lemon juice
1 tablespoons lemon zest
2 teaspoons cinnamon
1/2 teaspoon grated nutmeg
2 tablespoons flour
¼ cup sugar

Topping
¾ cups rolled oats
¼ cup brown sugar
1/3 cup butter, softened
Pinch of salt
  1. Preheat oven to 375 degrees F.
  2. Wash, peel, seed and chop pears.
  3. Place pears in a bowl and toss with lemon juice.
  4. Mix in flour, lemon zest, cinnamon, nutmeg and sugar.
  5. In a separate bowl combine rolled oats, brown sugar, softened butter and salt.
  6. Spread pear mixture into an 8x8x2 inch glass baking dish.
  7. Sprinkle oat topping evenly over pears.
  8. Bake for 35 to 40 minutes until topping is golden.
  9. Serve warm with vanilla ice cream or whipped cream.


Notes, Tips and Suggestions
  • I happened to have fresh raspberries and added a handful, absolutely delicious. (I suppose this would also change the name of the recipe to Pear, Raspberry Crisp)
  • The pears I used were very sweet, next time I will omit the sugar altogether if the pears are sweet enough.
  • The recipe called for greasing and flouring the pan, I did not find this necessary as the butter from the topping is sufficient to stop the fruit from sticking to the bottom of the pan.
  • The original recipe called for 3 pears, in my estimation not enough to fill an 8x8x2 inch pan.  I increased the quantity to 6 pears and adjusted the measurements for the remaining filling and topping ingredients as well.

Friday, September 14, 2012

Chocolate Zucchini Bread


I have the feeling that this was not the year of the zucchini.  By now I would have received several large zucchini specimens as gifts but to date have only received one and believe the season is just about over.

The one I did receive measured about eighteen inches in length and didn’t survive the few days delay in using it in some way.  Thankfully, a short trip to the market took care of the zucchini shortage and I’m not missing the overabundance which is usually the case.

The days are definitely getting shorter and cooler and this always inspires me to get something into the oven early in the morning warming up the kitchen in a comforting way.

Zucchini is such a versatile vegetable excellent for both sweet or savory recipes and no matter how it's cooked gives off the most delicious aroma.

Zucchini Frittata, Poor Man’s Zucchini and Zucchini Muffins along with this Chocolate Zucchini Bread are recipes that I make often since zucchini is available throughout the year.

This recipe for Chocolate Zucchini Bread was given to me by a family friend a while back.  Up to that time the recipe I was using did not call for chocolate as an ingredient.  My old recipe was quickly replaced and I’ve been using this one ever since.

If chocolate is not an ingredient listed in your recipe For Zucchini Bread or don’t have a recipe at all, this one has great possibilities of becoming your favourite.


Chocolate Zucchini Bread

3 eggs
1 ¾ cups sugar
1 cup corn or vegetable oil
2 teaspoons vanilla
2 cups shredded unpeeled zucchini (about 3 medium size)
2 one ounce squares semisweet chocolate, melted
3 cups flour
1 teaspoon each baking powder, soda, salt and cinnamon
½ to ¾ cups chocolate chips (optional)
  1. Preheat oven to 350 degrees F.
  2. Grease two 8x4 inch loaf pans
  3. Beat eggs until frothy.
  4. Gradually add sugar, oil and vanilla
  5. Beat in zucchini and melted chocolate.
  6. Sift together flour baking powder, soda, salt and cinnamon.
  7. Stir dry ingredients into egg mixture until well combined.
  8. Add chocolate chips if using.
  9. Divide batter into prepared loaf pans.
  10. Bake for 45 to 60 minutes.
  11. Remove from pans and cool completely on cooling racks.


Notes, Tips and Suggestions
  • If you don’t have chocolate squares substitute 3 heaping tablespoons of chocolate chips for each square of chocolate.
  • Just as delicious without the chocolate chips, after greasing pans pour half of the batter into one pan then add half the amount of chocolate chips to remaining batter and fill remaining pan.
  • Instead of chocolate chips add raisins or nuts.
  • These loaves freeze very well.

The Harvest 


Well who could have imagined that the two homeless Aubergine plants would bring in such a generous harvest.  I will admit that initially I didn't hold much hope that the little, sad looking plants would survive let alone bring forth fruit.
I enjoyed watching them grow, peeking under the large leaves now and then to observe their progress and just marvel at their beautiful colour, unique shapes and sizes.
Last Saturday I ventured out in the rain and with a little sadness in my heart snipped them from the plants.
The visions of Eggplant Parmigiana which I had been entertaining for weeks in my mind finally materialized and we enjoyed the best  Parmigiana ever!

Friday, September 7, 2012

Peppers and Eggplant Calabrese


Being born and raised in an Italian family does not make one familiar with all Italian cuisine.

I enjoyed peppers prepared in several different ways while living at home and of course naturally assumed that all Italians inherited the same delicious recipes. 

No matter how my mother prepared peppers, whether roasted, stuffed, fried or  Pizzaiola the delicious aroma totally filled the house then permeated through the window frames filling a good part of the surrounding neighbourhood .

After meeting my husband who was born and raised in Calabria, Italy and sharing meals with his side of the family I realized that my mother had unfortunately not inherited this particular recipe for peppers and eggplant.

Finding it absolutely delicious and almost addictive I ventured to find out how it was made.

Discovering the differences of regional Italian cooking is an adventure in itself.  It’s interesting to note how within a rather small country  the cooking styles and ingredients can vary as much as they do by region. 

It’s not easy to capture recipes that have never been written down and only shared by word of mouth.  After chasing down these elusive recipes I take on the task of documenting what may otherwise become an endangered recipe species.

After getting a general idea on how to put this dish together and not quite understanding the instructions fully I began to experiment hoping to replicate this most delicious combination of vegetables.

I’m not quite sure if it would pass the taste test of all discriminating Calabrese palates but am proud to say that my version has been approved by the palate of the one Calabrese I aim to please most and am happy with that!


Peppers and Eggplant


These quantities are approximate and need not be exact.

4 to 5 large red Sheppard Peppers
1 medium size eggplant
2 to 3 cloves garlic
1 cup plain tomato sauce
salt and pepper to taste
corn or vegetable oil for frying
2 to 3 hot peppers (optional)
  1. Wash and thoroughly dry peppers then cut into strips.
  2. Peel eggplant cut into thick slices then chunks.
  3. Dredge eggplant chunks in flour and shake off excess.
  4. Heat oil in a large skillet and fry pepper strips until they soften and begin to brown (do not overcook) drain with a slotted spoon and set aside.
  5. Fry floured eggplant chunks in same oil until golden brown, drain and set aside.
  6. Drain the oil from the skillet leaving about 2 tablespoons in the pan.
  7. Heat the oil and add crushed or finely minced garlic and saute until just starting to become golden, add tomato sauce, reduce heat and simmer until sauce reduces and becomes thick, add salt and pepper.
  8. Add fried eggplant and peppers together lightly tossing them in the sauce until well coated.
  9. Transfer to serving dish and serve warm or completely cooled.


 Notes, Tips and Suggestions
  • Hot peppers are generally added to the mix of sweet peppers. Because of the different preferences concerning spicy food a few hot peppers can be fried separately and enjoyed  by those who love them.
  • Thinner fleshed peppers such as the Sheppard variety seem to work well perhaps being the reason that I only make this dish when these peppers are in season.
  • Since both peppers and eggplant will be fried in the same oil, frying the peppers first is recommended. The flour on the eggplant will leave residue in the oil that will begin burning if the peppers are fried after the eggplant.
  • The finished product should not be sitting in a lot of sauce but just enough tomato sauce to coat the eggplant and peppers, almost undetectable. (It took me a while to achieve this.)
  • These should only be consumed with a loaf of  good,crusty Italian bread.
  • Number of servings remains undetermined depending on if you are willing to share any.